In this short tutorial, we'll cover the basics that you need to get your professionaly looking website up and running!
Website Layout
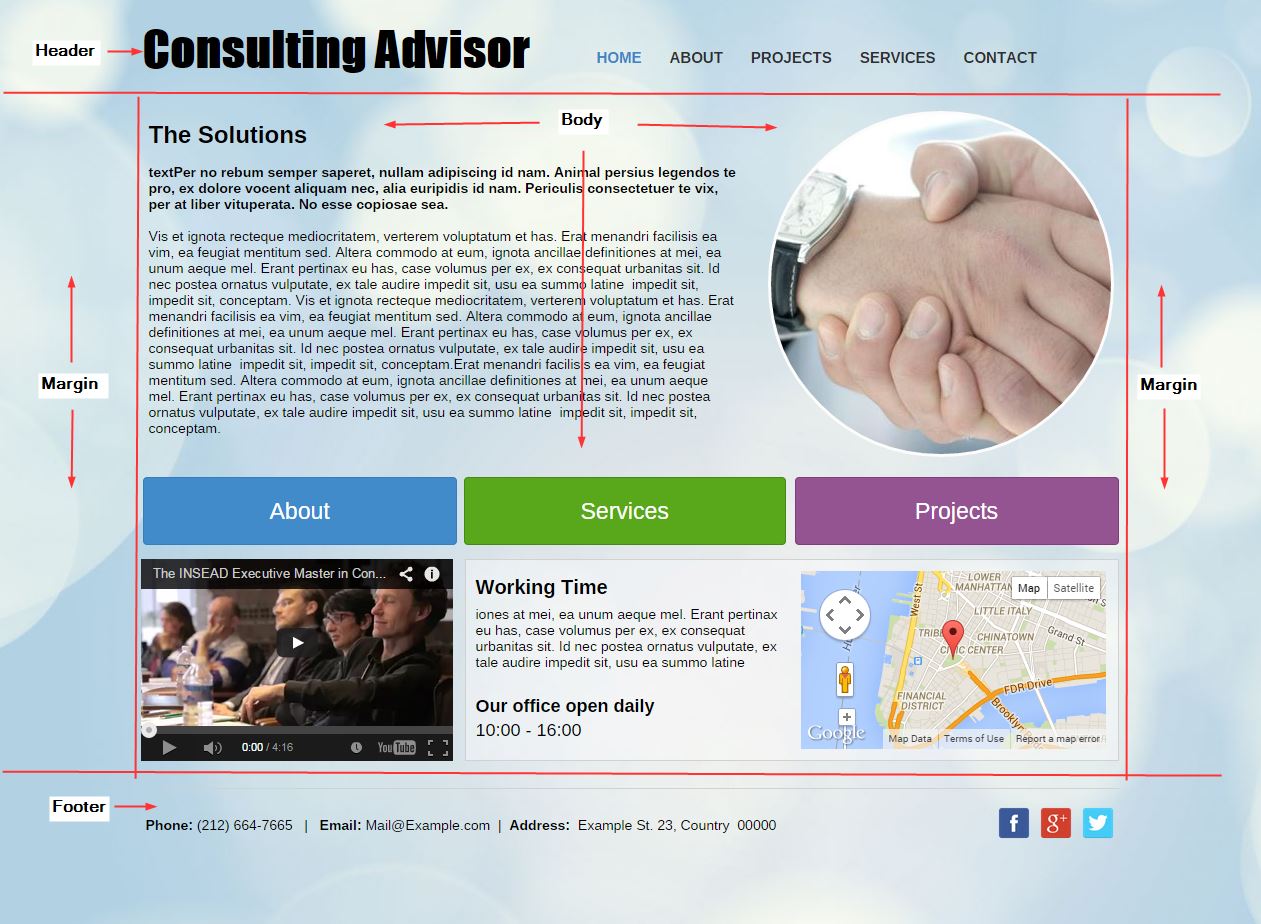
As you can see, in the management interface, your website is split by blue lines into 4 main sections: Header, Footer, Body and Margins.
Anything placed within the Header or Footer areas will appear in all of your pages.
The Body is the area that contains the content of each particular web page.
The Margins are the empty spaces on the left and on the right. In order to maintain good compatibility across various screen sizes, we strongly recommend that you keep all your content within the body's boundaries.

Modifying Template Elements
You can easily modify and replace elements in the selected template by left-clicking and opening the contextual menu. Different elements have different options. For example, to modify written text in a Text element, left-click on the element and select Edit.
You might have noticed that when you left-click an element, an orange frame appears around it. You can use these orange-lined edges to change the size of the element.
To remove an element, left-click on it and select the Remove button from the contextual menu.
To change the position of an element, simply drag it around the website.
You can add elements easily to your website by dragging them from the Toolbar. For example, selecting the Popular tab and dragging a text element to your website will add it to the page. As you can see, you can drag elements onto other elements creating spectacular effects. The Toolbar has many other tools you can drag and drop to your website. Feel free to experiment. Anything you do can be undone, so don’t be afraid to accidentally ruin your website.
We’re almost done changing our first web page. All we need to do now is click the Save button on the top left to save our work. It will not be saved until we explicitly save it ourselves.
Modifying Pages
All we’ve done up until now was modifying the first page or the Home page, We’ll now look at how to update other pages.
Clicking on Pages on the top left will open the Page manager. You can left-click on any page to navigate to it. If you haven't saved your work so far, a pop-up alert will notify you before moving you to the next page.
To delete a page, right-click on it in the Page manager and select Delete.
Adding More Pages
To add a page, click on the Add button on the top left, marked with a Plus sign. You’ll need to enter a page name, decide if it should be a category (more on that later) and select its position. Pages can be located in Main Menu or Secondary Menu or in the Pages area, which contains pages that are not displayed on any visible menu. Any page located within Top Menu will appear in the Pages Menu automatically.
You can read more about page management here.
Your Website, Your Domain
Each new website is automatically allocated a temporary subdomain and can be immediately shared with your friends, family and business associates!
Brand Yourself with a Custom Domain
To see your temporary subdomain, please click the Domain button. Your domain is the topmost line written in blue.
You can modify this free domain by clicking Change Address. Try changing your domain name to “MyNewWebsite” and click Apply.
It is recommended to replace the temporary address with your own custom domain such as, for example, www.example.com. The site will appear online under the new domain name as soon as a hosting package is purchased.
Opening a New Website
Once you have started a website, it is live! We provide you with a free subdomain which can be changed at any moment.
In order to access the free subdomain, you will be asked to enter a temporary 4-digit password. You can find you subdomain and the password by clicking the Domain button on the top right. The password will appear underneath your subdomain.
As soon as your hosting package has been paid, the password will no longer be required and your website will be available to visitors.