In this short tutorial we will cover the functionality of the Free Text element, explain how to add, style and design text.
Adding Simple Text
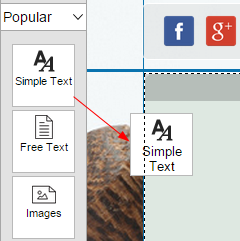
The Simple Text can be found on the side toolbar, under the Popular category. This type of text element is recommended for creating titles and subtitles. You can drag it to the page and place it in the desired location.


Adding Free Text
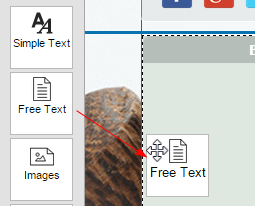
The Free Text element is located on the side toolbar, next to the Simple Text. This is another text management tool that is suitable for larger textual content blocks. The Free Text is equipped with an advanced web content editor that resemples MS Word. A Simple Text can also be dragged and placed in the designated location on your web page.

Resizing Text Element
You can resize any element by dragging the orange borders around it that appear when the element is selected.

Editing Text Element
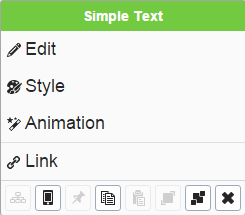
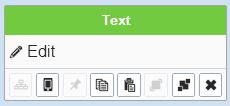
To edit the text, left-click on the element and select Edit.

Copying Text from an External File
You can copy entire texts from external text files by the simple means of copy and paste.
Changing Text Element’s Position
You can change the position of any element by clicking on it and dragging it around the page. The cursor will have the following shape:

Rotating Text Element
You can rotate any element by clicking on it and holding the following rotation icon:

Simple Editing Interface
The default editing interface appearing upon clicking on Edit has the following functions:
B, I, U, S - Bold, Italicize,Underline or Strikethrough.
Numbered List - Forms a numbered list from the selected text.
Bullet List - Forms a bullet list from the selected text.
Align - Aligns the text to the left, center or right of the text box.
Link - Links the selected text. You can link to a page in website, a page in a different website, a file or an email address.
Unlink - Cancels a link in the selected text.
Text Color - Changes the text color of the selected text.
Paragraph Format - Sets the HTML tags of the text (H1-H6 and regular text).
Font - Sets the font of the selected text. If no text is selected, the entire text changes.
Size - Sets the size of the selected text.
Advanced Editing - Opens the Advanced Editing Interface.

Advanced Editing Interface

The Advanced Editing Interface offers even more functionality.
New Page - Clears everything in the text box.
Preview - Shows the text itself as seen by a browser.
Cut, Copy, Paste - The basic Cut Copy and paste functions.
Copy as plain text - Clears any formatting added by external text software, when copying and pasting from them.
Undo, Redo - Reverts back and from recently made changes.
Find & Replace - Enables to search and Search & Replace.
Select All - Selects all the text in the box.
Print - Allows you to print currently typed text.
Remove Format - Removes all the format elements from the text, reverting it back to plain unformatted text.
Superscript, Subscript - Enables you to add a text line in the Sub or Sup position.
Indent - Increases or decreases the indent of the text paragraph.
Blockquote - Sets the Blockquote tags for the selected text.
Text Direction - Sets text direction: left-to-right or right-to-left.
Anchor - Creates a location on the page that can be linked to from within the same text box, Useful for extra long lists.
Image - Adds an image to the text box - You can choose to add an image from one of the following sources:
-
Your own PC
-
The file manager.
-
The system’s gallery.
-
An external link.
Flash - Adds a flash file to the text box - You can choose to add a flash file from three different sources:
-
Your own PC.
-
The file manager.
-
An external link.
Table - To add a table, click the Table icon.
Once you finish configuring the table, click OK.
Insert Horizontal Line - Adds a horizontal line to the text box.
Insert Special Character - Allows you to add characters that are not found on the keyboard, such as the copyright mark, for example.
Background Color - Highlights the text itself (not the text box).